Learnings / Networking
IoT devices & UniFi networks
Getting a SurpLife smart light back online took more than putting it on a 2.4 GHz network. These are the setup steps that helped.
The setup
Many inexpensive or older IoT devices, particularly lights, only support 2.4 GHz Wi-Fi. I already had a dedicated 2.4 GHz IoT network alongside my main UniFi network, which uses 2.4, 5, and 6 GHz. After moving the network, some devices did not reconnect.
One particularly difficult case was a YHW Smart RGB LED Floor Lamp, an inexpensive Amazon purchase controlled through the SurpLife app. Reconnecting it produced a series of errors: cloud registration could fail with a “failed to load” message, and Google Home could show the light as offline even when the native app worked.
The sequence below covers account checks, Wi-Fi compatibility, DNS filtering, a temporary intrusion-prevention change, and a fresh pairing. UniFi and app menu names vary by version. These are notes from this setup; the same symptoms can have other causes.
1. Check accounts & cloud status
- Ask Google Assistant:
Hey Google, sync my devices.
- In Google Home, open Settings or the Works with Google setup flow. Find SurpLife and choose Reconnect account, or re-link the account.
- In SurpLife, long-press the device and open Device Information through the … menu. Check that its cloud status is online. If it is offline, power-cycle the lamp and check again.
Local control and cloud registration are separate checks. A light responding in SurpLife does not necessarily mean its Google Home integration is ready. This was my situation: the lamp worked locally in SurpLife, but its cloud status was “offline” and Google Home still showed it as offline.
2. Adjust the IoT Wi-Fi
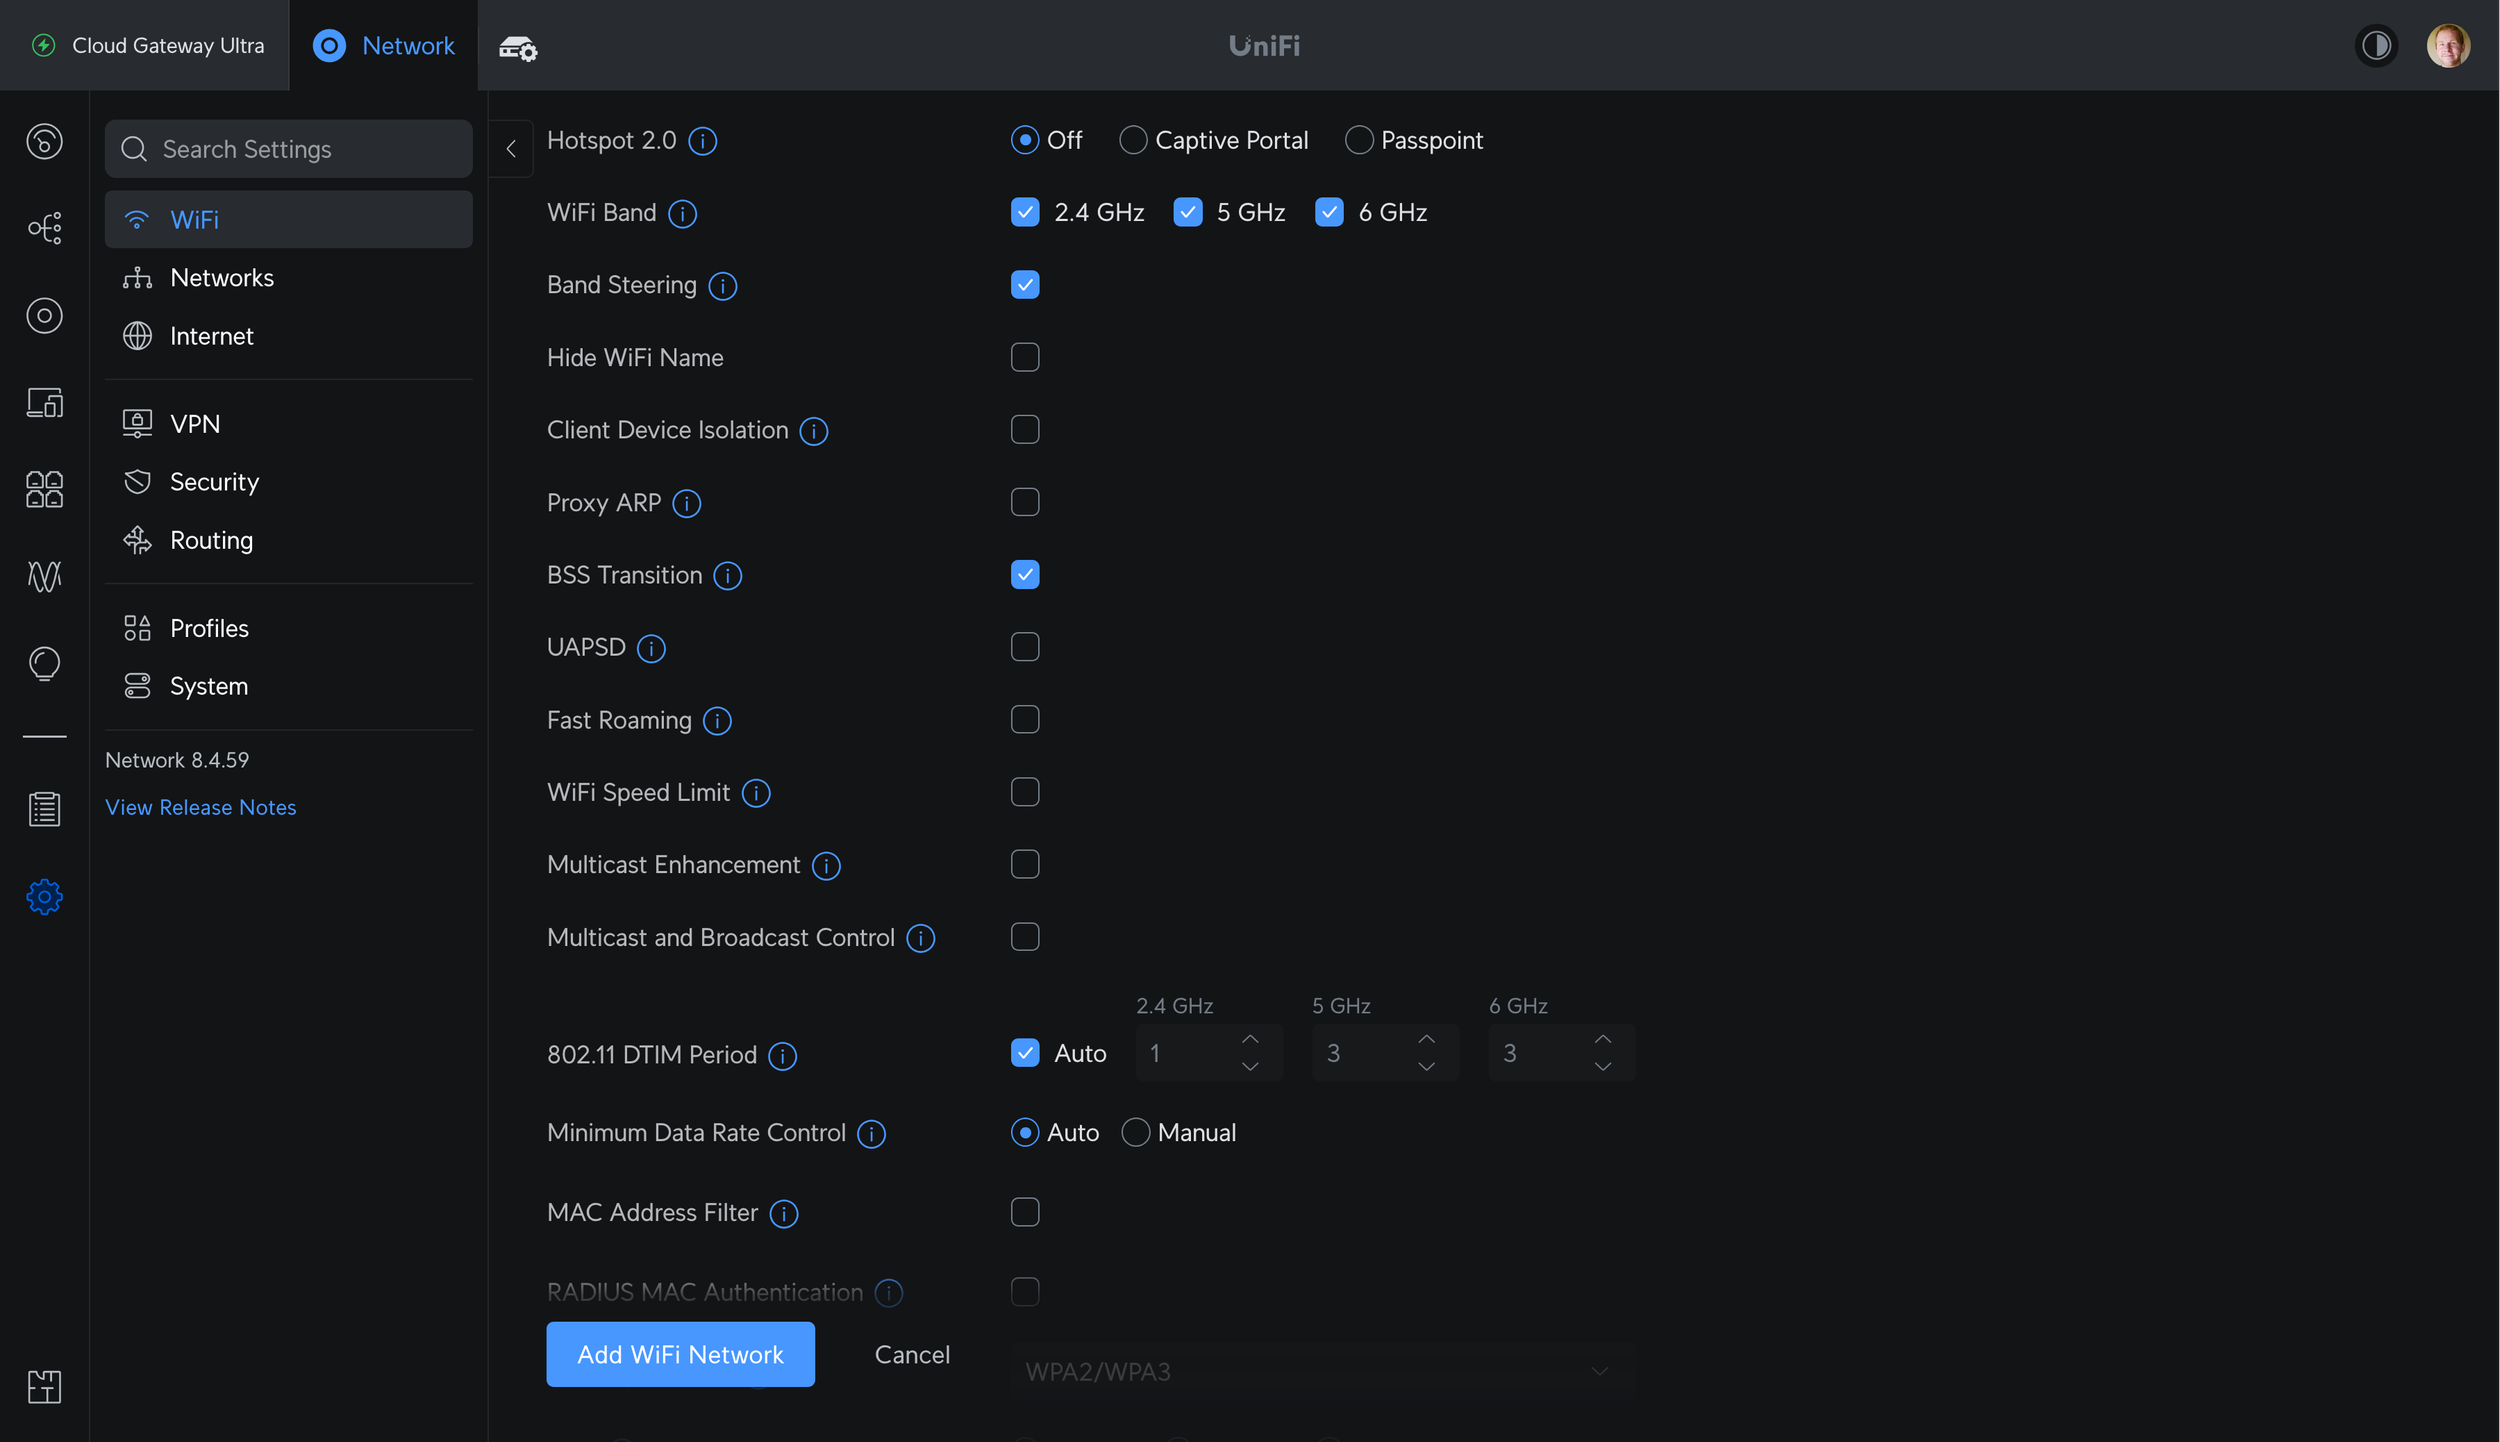
Record the original settings first. In Settings → WiFi, select the dedicated 2.4 GHz IoT network and open its advanced settings (switching from Auto to Manual if needed). My network was already 2.4 GHz only; if yours is a mixed 2.4/5 GHz network, disable the 5 GHz band for the IoT network.
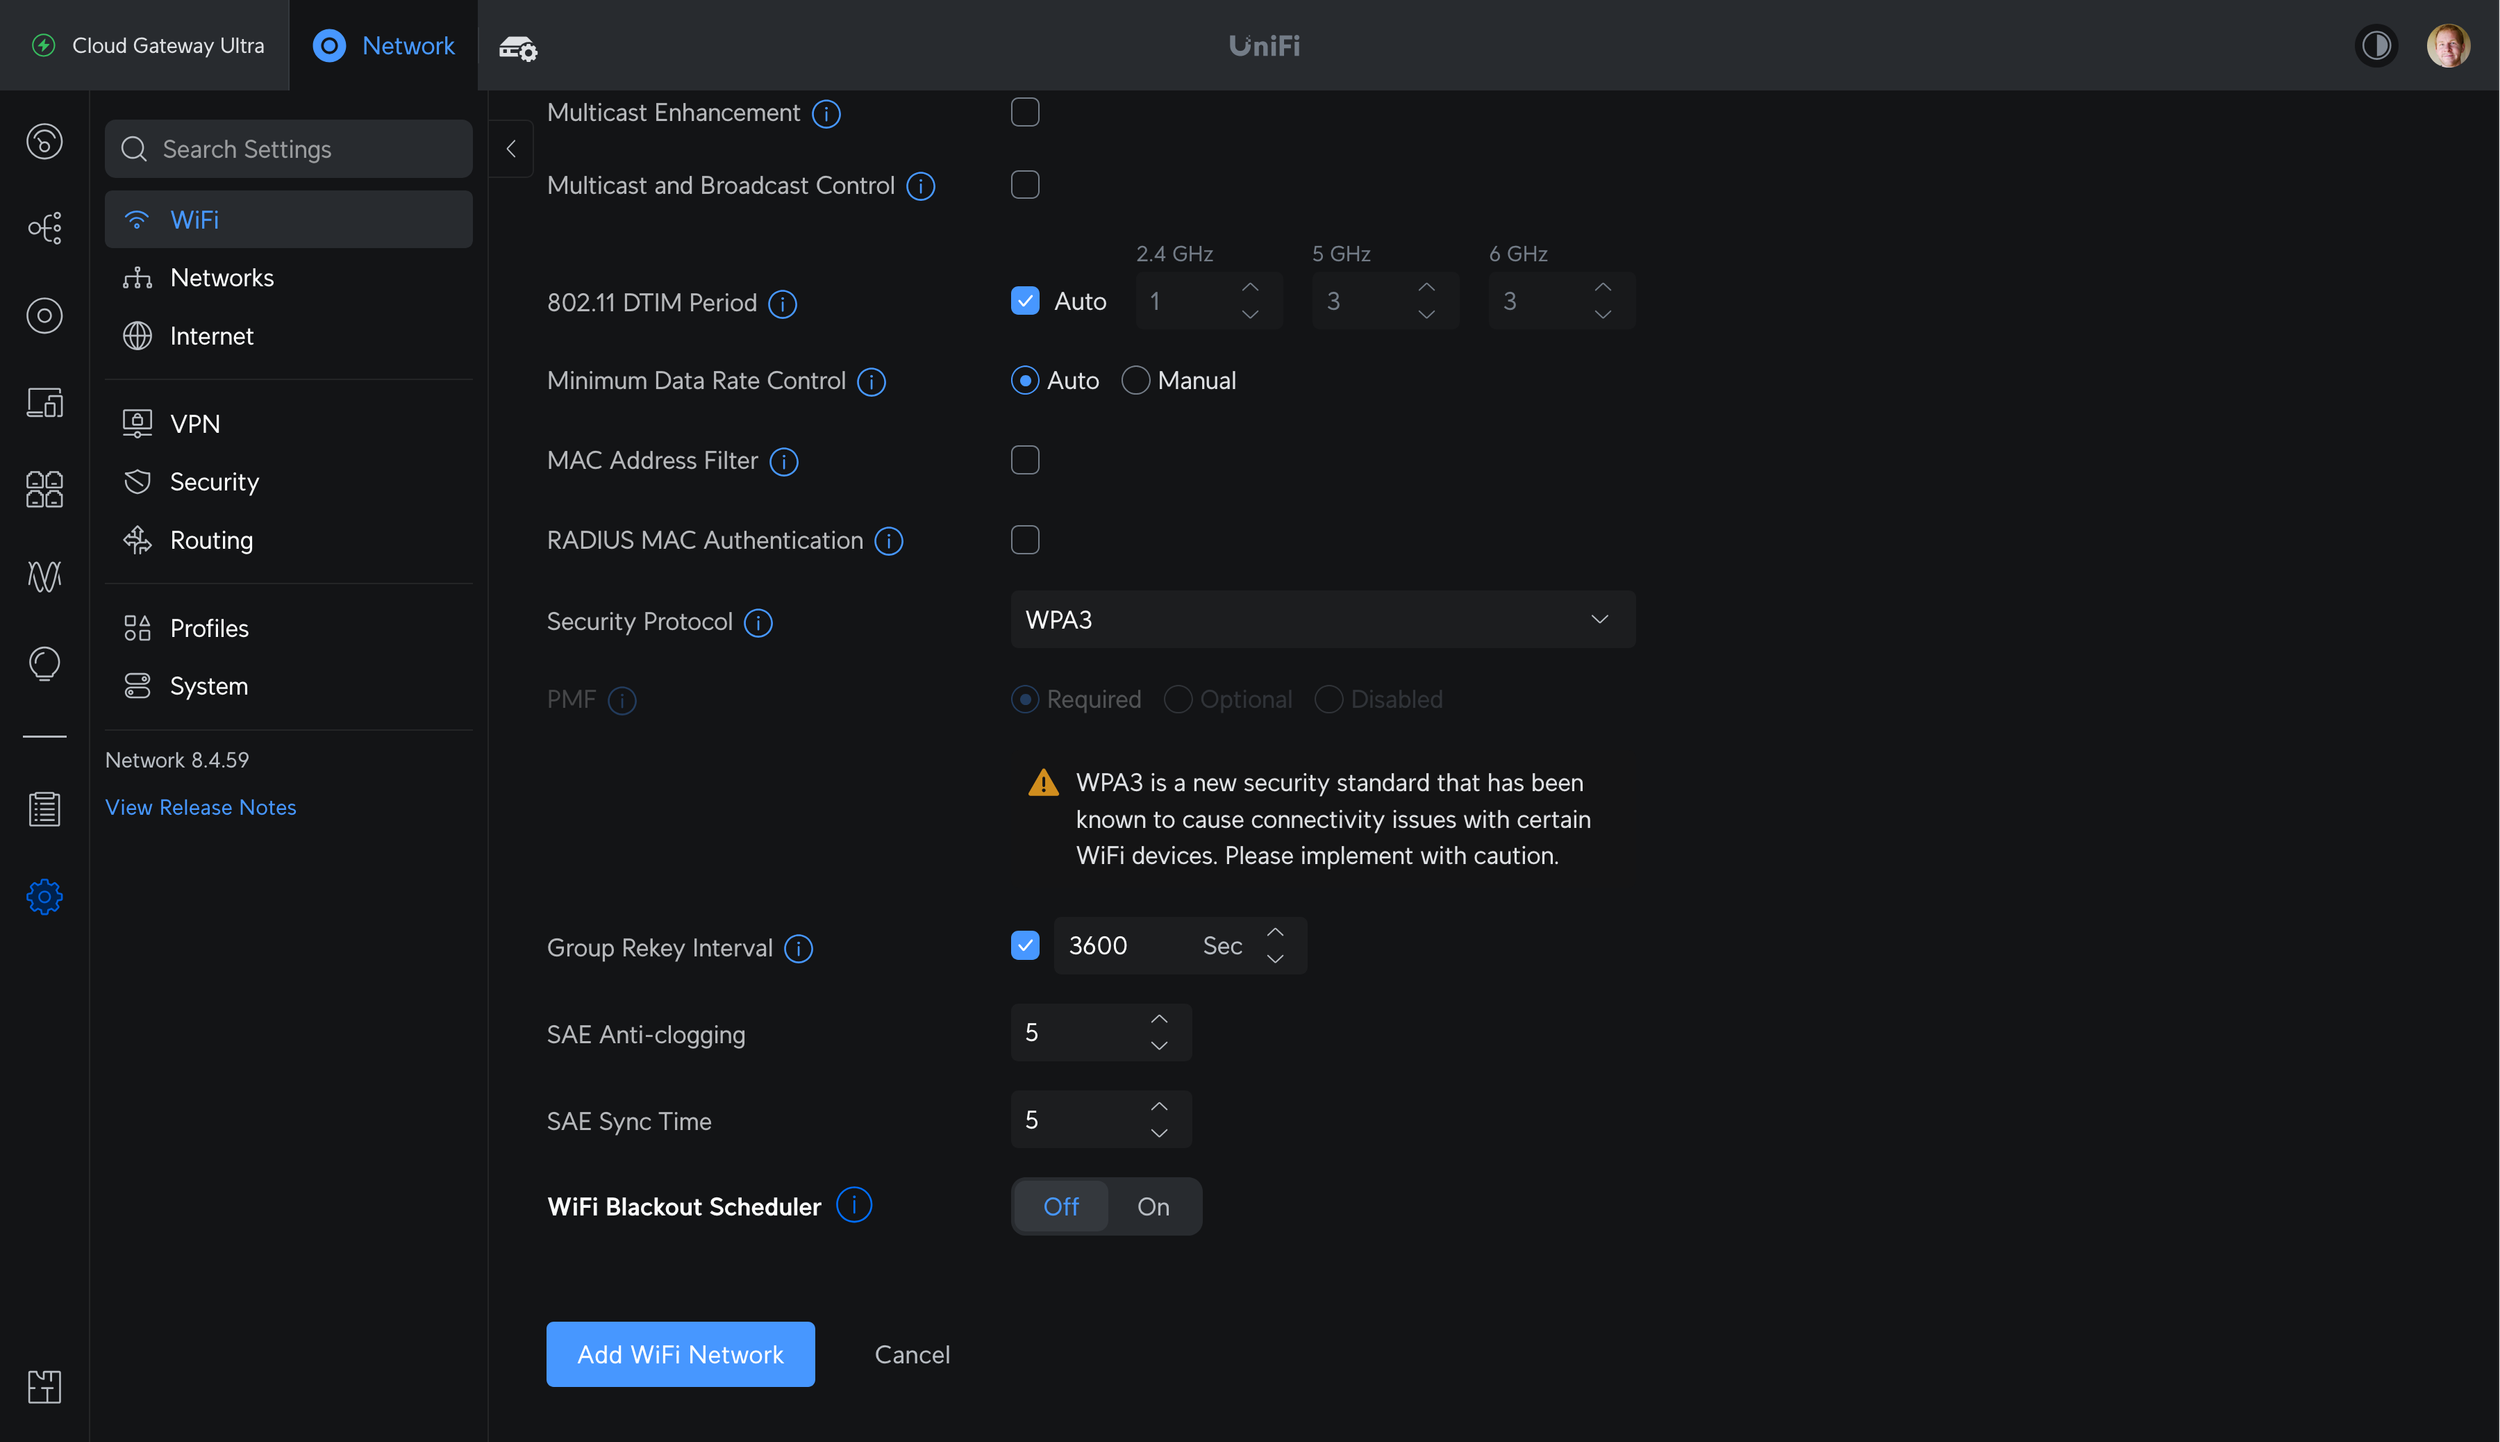
- Set Security Protocol to WPA2. Some older IoT clients have trouble with WPA3 or mixed WPA2/WPA3 mode.
- Set Protected Management Frames (PMF) to Disabled during setup. WPA2 allows this option; WPA3 requires PMF.
- Turn BSS Transition and Fast Roaming off for compatibility with older clients.
- The setup sequence included turning Multicast to Unicast (also called Multicast Enhancement) on. This is device-dependent: Ubiquiti's general IoT troubleshooting guidance recommends trying it off, so treat it as a setting to test rather than a universal fix.
- If discovery must cross separate networks or VLANs, check the gateway's Multicast DNS (mDNS) settings and use Auto for common services. Depending on the version, look under Settings → Networks, Services, or Security → Advanced. mDNS helps supported local discovery across networks; it does not fix cloud registration by itself.
Apply the changes before trying to pair again.
3. Test without filtering DNS
Ad- and malware-blocking DNS also seemed to interfere with some part of the lamp's registration. Switching to a standard public resolver without that filtering is a way to test whether DNS blocking is involved before retrying pairing.
In UniFi, the DNS servers handed to devices through DHCP are configured per network (VLAN). Change the network the lamp actually uses—in this setup, the IoT network—rather than assuming the main network's settings apply to it. Also check the gateway's separate upstream DNS settings under Internet: when clients use the gateway for DNS, those upstream servers matter too.
- Open Settings → Networks and select the lamp's network. This may be called Defaultif you have not created a separate IoT network.
- Scroll to DHCP, expand Advancedif needed, and find DHCP Service Management → DNS Server. Menu labels vary by UniFi version.
- Record the existing settings, then change DNS Serverfrom Auto to Manual.
- Enter a pair of public DNS addresses: Google Public DNS uses 8.8.8.8 and 8.8.4.4; the standard Cloudflare resolver uses 1.1.1.1 and 1.0.0.1. Use one provider's pair for this test.
- In the UniFi Network application, also open Settings → Internet, select the active Internet connection, and find DNS Server (under Advanced if needed). Ensure Auto DNS is on, or check that any manually configured servers are not ad- or malware-blocking resolvers. Replace filtering servers with one of the public DNS pairs above for the test. Auto uses the Internet provider's DNS; if that service also filters requests, use an explicit non-filtering pair.
- Click Apply Changes, then reconnect or power-cycle the lamp so it can pick up the new DHCP settings before retrying registration. Existing DHCP leases may retain the old DNS servers until they renew.
If UniFi content filtering redirects DNS queries, changing the advertised servers alone may not bypass that filtering. Check the network's filtering policy as well.
4. Temporarily pause intrusion prevention
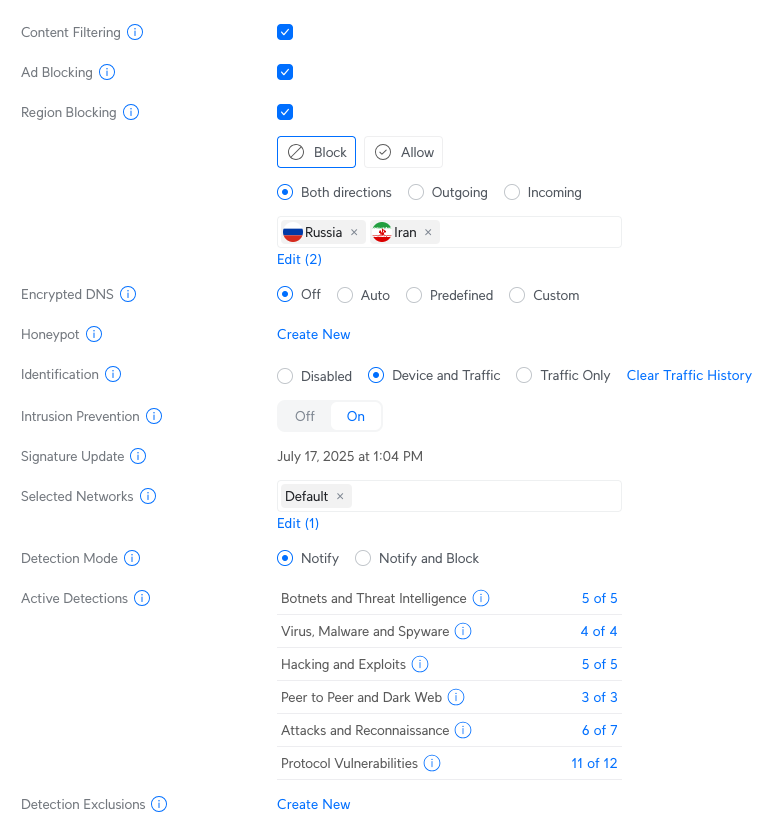
Temporarily disabling intrusion prevention was the key step in this troubleshooting sequence. In UniFi, open Settings → CyberSecure → Protection, or the equivalent Security / Firewall & Security screen. Turn Intrusion Prevention off and apply the change.
Keep this pause limited to the pairing attempt, then restore protection even if pairing fails. IPS can block traffic; IDS in notify-only mode reports detections without blocking. Check Security Detections for evidence of a block rather than assuming every registration error is caused by the firewall.
5. Reset & pair again
- Reset the lamp into pairing mode. For this lamp, the documentation suggested that the reset sequence involved switching power off and on three to five times, until the light flashed, pulsed, or cycled colors (Lifx bulbs work this way, for example). This didn't work for me. Instead, holding the touch-sensitive switch for about twenty seconds forced it to reset. Check your model's instructions, of course.
- Connect the phone to the 2.4 GHz IoT network, open SurpLife, and run the pairing process again. Confirm that cloud registration completes and the light reports online.
- Link SurpLife to Google Home using the app's prompt or the Works with Google flow. Test the light in both apps.
6. Restore protection & verify
- Re-enable intrusion prevention in UniFi and apply the change. Check that the lamp remains online and responds in SurpLife and Google Home.
- Change PMF from Disabled to Optionaland test again. Optional allows supported clients to use PMF while accommodating older devices; keep the setting the lamp can use reliably.
- Keep the dedicated IoT network on WPA2 if the lamp needs it. Revisit other temporary changes one at a time and verify connectivity after each change, including a lamp power cycle.
- If you restore the original filtering DNS, test both registration and everyday control again. If the problem returns, review the DNS filtering logs for a blocked service the lamp needs.
The lesson: a dedicated 2.4 GHz network is a useful starting point, but successful Wi-Fi association, local discovery, cloud registration, and Google Home account linking are distinct parts of setup.